It’s frustrating to face Snapchat can’t connect error as it disrupts your overall usage experience, ruining your mood. Well, nothing to worry about! Cuz we have your back.
This ultimate guide will insight into the problem causes and offer you effective solutions to let you have a seamless experience on Snapchat.
To fix various Android problems & errors, we recommend this tool:
This effective tool can fix Android issues such as boot loop, black screen, bricked Android, etc. in no time. Just follow these 3 easy steps:
- Download this Android System Repair tool (for PC only) rated Excellent on Trustpilot.
- Launch the program and select brand, name, model, country/region, and carrier & click Next.
- Follow the on-screen instructions & wait for repair process to complete.
Common Reasons for Connectivity Issues
- Internet issue- The Snapchat app heavily relies on strong internet. A slow or weak connection can lead to such an error.
- Server disruption- Temporary server outages or maintenance can be the reason why Snapchat couldn’t connect.
- Outdated Snapchat app- App glitches or outdated versions can trigger connectivity issues on Snapchat.
- Geographical limitations- Certain regions or countries may have restrictions that can affect Snapchat’s functionality. These restrictions are subject to government regulations.
Video Guide: Snapchat Login Says Could Not Connect
Troubleshoot Snapchat Can’t Connect: Get It Back on Track
Solution 1: Initiate Basic Troubleshooting
- Verify for server issue: Start your troubleshooting with a basic check-up. Check Snapchat’s server status on Snapchat’s official Twitter or other reputable sources. If facing a problem, wait until resolved.
- Check Internet Connection: Ensure that your internet connection is strong to support the Snapchat app to work flawlessly without interruptions. Consider switching to Wi-Fi if mobile data is slow or vice versa.
- Inspect for account-related issues: It’s possible that due to a violation of terms & service, your Snapchat account has been deactivated, blocked, or disabled. So, try checking for such issues.
Also Read: Does Snapchat Stories Won’t Load? Here are 6 Best Fixes to Try!
Solution 2: Restart Your Device & Snapchat
If you suspect any device issues or app glitches, force-stop the app and restart your device to resolve the temporary problems.
To do so, follow the steps mentioned here:
- Go to the Snapchat app icon on the Home screen.
- Next, long-tap the icon and select App info.
- Click on the Force stop option and confirm the same.
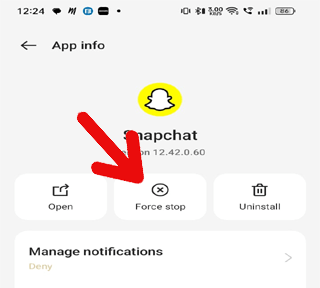
- Now, restart your device and relaunch
Solution 3: Clear Snapchat App Cache
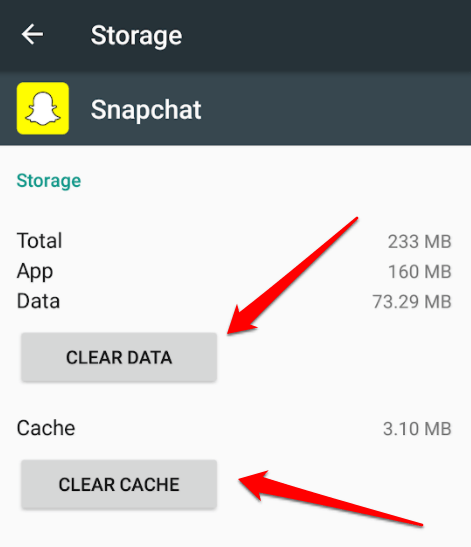
Clearing the Snapchat app cache can help you resolve issues caused by corrupted or excessive data. Following are the instructions to follow to do so:
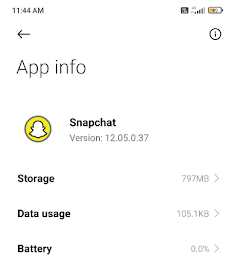
- Open Settings on your Android device.
- Go to the Apps section and select Snapchat on the list.
- Click on the Storage option.
- Tap on the Clear Data & Clear Cache options.
Solution 4: Re-Login Into Snapchat Account
Re-logging into your Snapchat app can fix temporary connection issues between the app and its server.
To do so, follow the below steps:
- Open the Snapchat app on your Android device.
- Then, click the Profile icon> Gear icon.

- Scroll down and select the Log out option.
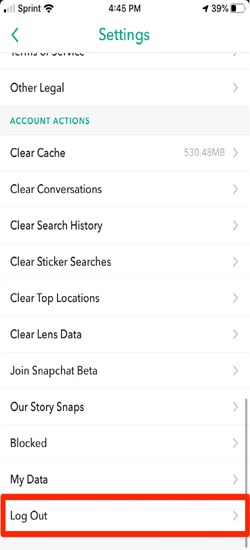
- Next, confirm by tapping the Log out option again.
- Once logged out, re-login into your account.

Also Read: Snapchat Add Friends Not Working on Android!
Solution 5: Uninstall Unauthorized Apps & Plugins
Avoid using unauthorized apps and plugins to fix could not connect error on Snapchat. Using such unofficial apps and plugins violates Snapchat’s Terms of Service, causing connection problems. So, find such apps & plugins and uninstall them.
Solution 6: Use a VPN Service
If you are trying to use Snapchat outside the allowed region and facing Snapchat couldn’t connect error, use VPN. VPN will connect you to the supported region and let you use the app without a problem.
Also Read: VPN For Android – Best Android VPN Apps
Solution 7: Reinstall Snapchat App
Uninstall the app and then reinstall the latest version to escape the connection problem.
Follow the below steps to do so:
- Visit the Home screen and hold the Snapchat app icon.
- Click on the Uninstall option and confirm the same.

- Once uninstalled, go to the Play Store and search for the Snapchat app.
- Now, click on the Install button to download the latest version.

Also Read: Snapchat Filters Keep On Loading
Get Alternatives for Snapchat
Here are some of the popular Snapchat app alternatives that you might consider to connect with your friends and the world.

Instagram is the most popular and widely used social media app that allows you to create short videos with various effects and filters. It has a Stories feature similar to Snapchat using which you can share photos and videos with your followers.
The app offers various fun filters and stickers. It is best for those who enjoy making and watching entertaining videos.

WhatsApp is primarily a messaging app that also offers a Status feature to share your photos and videos. It provides various filter options to give your story different vibes. The app allows Group chats to let users connect with multiple persons at a time.
It works on end-to-end encryption that makes it more safe and secure for users.
Facebook Messenger

Facebook Messenger is another messaging app like Snapchat that lets its users connect with the whole world. It offers a wide array of fun stickers, filters, GIFs, and emojis to make your conversation more interesting.
This app has a feature called “My Day“, similar to stories on Snapchat or Instagram which allows users to share photos and videos for 24 hours.
Recommended: Use Android Repair Tool to Fix Android Issues
If your Android phone is encountering issues such as apps keep crashing, bootloop issue, blue screen problem, etc, try Android Repair Tool.
This software is capable of fixing Android-related problems with ease. It is supportable on almost all Android brands including Samsung, Sony, Nokia, Oppo, HTC, and many others.
The software is 100% safe and can be used easily with a few simple clicks. You just need to download the software and follow its user guide.

Note: It is recommended to download and use the software on your PC or laptop only.
Frequently Asked Questions (FAQs)
Is using a VPN safe for Snapchat?
Although using a VPN can help you bypass the geographical restrictions, be cautious using it. Snapchat prohibits the use of VPNs, and using one could lead to account suspension.
Can certain device cause Snapchat connection issues?
Yes, connection problems may sometimes be device-specific. In such a case, try using the Snapchat on another device. If working fine, update the software on the device that is having Snapchat connection issue.
How can I improve my Snapchat experience?
To have a flawless Snapchat experience, use strong internet, update the app regularly, and follow Snapchat's guidelines and norms to avoid account issues.
Conclusion
If everything else fails, contact Snapchat’s Support team. They can provide specific guidance based on your issue.
Start by verifying your Wi-Fi or mobile data connection. A stable internet connection is essential for Snapchat to function correctly.
James Leak is a technology expert and lives in New York. Previously, he was working on Symbian OS and was trying to solve many issues related to it. From childhood, he was very much interested in technology field and loves to write blogs related to Android and other OS. So he maintained that and currently, James is working for androiddata-recovery.com where he contribute several articles about errors/issues or data loss situation related to Android. He keeps daily updates on news or rumors or what is happening in this new technology world. Apart from blogging, he loves to travel, play games and reading books.